3
privacy-policy,paged,page-template-default,page,page-id-3,paged-11,page-paged-11,qode-social-login-1.1.3,qode-restaurant-1.1.1,stockholm-core-1.1,select-child-theme-ver-1.1,select-theme-ver-5.1.8,ajax_fade,page_not_loaded,wpb-js-composer js-comp-ver-6.0.5,vc_responsive
Title Image

Privacy Policy

  • Sort Blog:
  • All
  • Cloud Computing
  • Disaster Recovery Management
  • IT Security Services
  • Managed IT Services
  • Office 365
  • Our Blogs
  • Press Releases
  • Uncategorized
  • VOIP Services

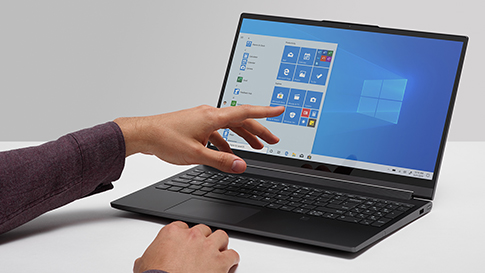
Windows 10: Boost your PC’s performance with these tips

Windows 10 has a lot of special features that aim to improve your computing experience. Unfortunately, many of these may also slow your PC down, especially if your machine is older or has a low-end processor. We’ve listed four effective tweaks to make your Windows 10 computer faster.

Prevent programs from launching at startup

Windows makes certain programs readily available by loading them at startup. While Microsoft likely has good intentions for doing this, this auto-launch feature slows down your computer. To fix this issue, you’ll need to adjust your settings.

Open the Task Manager by pressing Ctrl+Shift+Esc. On the Startup tab, select a program you don’t want launching at startup — such as a media player or an optional accessory that doesn’t have to be active all the time — then click Disable. To be on the safe side, however, keep essential apps such as antivirus software enabled.

Get rid of useless applications

Having too many programs installed on your computer uses up valuable memory and hard disk space. This slows down your machine and makes it work harder than necessary. Quickly uninstall programs you don’t need by following these steps:

  • Tap the Windows key on your keyboard and type “Add or remove programs” in the search bar. Selecting the first result opens a System settings window.
  • Under Apps & features, you will see all the apps stored on your computer.
  • Select the program/s you no longer want, and click Uninstall.

You’ll then be guided through several steps to complete the uninstallation process.

Organize your disks

It’s important to regularly clean out your computer of data you don’t need. Thankfully, Microsoft’s Disk Cleanup tool makes it easy to do so.

To find the tool, tap on the Windows button on your keyboard and type “Disk Cleanup.” If you click on the first result, the tool will launch and automatically find files that take up too much memory space, such as temporary internet and system memory dump files. Make sure that the checkbox before each option is selected, then click OK to send these files to your Recycle Bin.

Turn off apps running in the background

You may not know it, but there are a lot of programs that run in the background as you use your computer. Even when you’re not actively using them, these apps run in the background so they can receive information, send notifications, and download and install updates. However, they also slow down your CPU. Disabling these apps will reduce the burden on your computer and speed it up.

To find out what programs are running in the background, press the Windows button on your keyboard, type “Background apps,” and hit Enter. Find the programs you don’t need running and toggle the On-Off button.

By following these four steps, you’ll see a noticeable difference in your PC speed. If you want to learn how to optimize your Windows system further or need assistance with other Microsoft products, give us a call.

Want To Make Sure Your Business Is Protected From A Data Disaster?

Losing access to your business’s data in this day and age could very well mean losing everything. That means that as data becomes an increasingly important commodity to businesses of all types and sizes, so does having a plan for if or when your business experiences a data disaster.

The thought of protecting your business against a data disaster might be daunting, but don’t worry. By following the steps listed below in this article, you can make sure that your business is ready to take on the challenge.

However, before we actually get into those steps, there is one distinction you should understand: the difference between a business continuity plan and a disaster recovery plan. A business continuity plan is primarily proactive, in that it is a strategy by which a business can continue to operate no matter what kind of disaster or setback befalls it. A disaster recovery plan is primarily reactive and has to do with how a business acts immediately following a disaster of some sort – in this case, a data disaster.

So, now that we’re clear on a disaster recovery plan, here are the steps your business can take to create one that works for you and your employees.

Step 1: Rally The Troops And Assess Your Equipment

In the fight against data disasters, everyone has to be on board. Otherwise, there will always be holes in your defense plan. That’s why executive buy-in – getting everyone in the company, from the CEO to the entry-level employees – is crucial. You need everyone to collaborate cross-functionally to fully protect your business.

From there, you need to thoroughly analyze each of your business’s systems, applications, and data sets, as well as how they’re physically accessed, to suss out any potential vulnerabilities. Then you should determine which systems are absolutely critical to the operation of your business and for getting products and services to your customers. These are the functions that will need to stay up and running, even after a data disaster.

Step 2: Create Your Disaster Recovery Strategy

Once you have everyone on board and an understanding of your equipment and assets (as well as their vulnerabilities), it’s time to actually formulate your disaster recovery plan. To do this, you should take a look at your budget, resources, tools, and partners in this endeavor. When you understand how long it takes your business to get back online and the cost of doing so, you’ll have a good idea of how to move forward.

Step 3: Test Your Strategy

No great plan is complete without first testing it to see if it will work. Put your disaster recovery plan through a trial run to see how quickly your team responds to solve the problem and see if any improvements need to be made to the process. Then, by the time an actual data disaster occurs, your business will know how to shut it down and keep running with no problem at all.

While the steps themselves aren’t difficult to understand, preparing your business to combat data disasters takes a lot of work. In the end, though, the work is worth it if it means protecting your data. As a recap, here are the four main action steps that you need to take in formulating a disaster recovery plan:

  1. Get executive buy-in for creating a disaster recovery plan.
  2. Analyze and evaluate your business’s systems, applications, and data to understand how they could be impacted.
  3. Find out which systems you need to keep running and prioritize them during the fallout of the data disaster.
  4. Test your plan before you actually need to put it into action.


Follow these steps, and your business’s data will be safe from any threat that comes your way.

Once Disaster Hits, Everyone Says, “I Wish I Would Have…”

Two years ago, no one could have predicted that countless businesses would shift to a remote work model. The pandemic hit hard and fast, and small businesses had to think on their toes. Many had only a few weeks to adapt. It was stressful and extremely challenging.

Looking back on it, many SMBs wish they’d had a plan in place that would have made things easier. When the pandemic hit in February/March 2020, SMBs had to absorb the huge cost of getting their employees up and running off-site. Not only was it costly, but it also took a lot of coordination and on-the-fly planning. This meant things slipped through the cracks, including cybersecurity.

As they say, hindsight is 20/20. You may wish you had a plan in place or had more time, but you didn’t. A vast majority didn’t. However, you can still plan for the future! While you never know when disaster is going to strike, you CAN be prepared for it. Whether that disaster is a pandemic, flood, fire or even hardware failure, there are steps you can implement today that will put you in a better place tomorrow. Here’s how to get started.

Put Your Plan Into Writing.

First and foremost, you should have a standard operating procedure to call on should something go wrong. For example, in early 2020, many SMBs didn’t have a security plan in place, let alone a remote work security plan. They had to make it up as they went, which just added to the challenges they were already experiencing.

To get over this challenge, work with an experienced IT services company or managed services provider (MSP) to put together a plan. This plan should include a cybersecurity protocol. It should define what malware software employees should be using, what number they should call for 24/7 support, who to contact when they receive suspicious e-mails, how to identify suspicious e-mails and so on.

More than that, it should outline exactly what needs to happen when disaster strikes. Pandemic? Here’s how we operate. Fire? Here’s what you need to know. Hardware failure? Call this number immediately. The list goes on, and it can be pretty extensive. This, again, is why it’s so important to work with an MSP. They’ve already put together plans for other SMBs, and they know where to start when they customize a plan with you.

Invest In Security And Backups.

While every business should have network security already in place, the reality is that many don’t. There are a ton of reasons why (cost concerns, lack of time, lack of resources, etc.), but those reasons why aren’t going to stop a cyber-attack. Hackers don’t care that you didn’t have time to put malware protection on your PCs; they just want money and to wreak havoc.

When you have IT security in place, including firewall protection, malware software, strong passwords and a company-wide IT security policy, you put your business and all your employees in a much better place. All of this should be in place for both on-site employees and remote workers. With more people working from home going into 2021, having reliable IT security in place is more important than ever before.

On top of that, you should have secure backups in place. Investing in cloud storage is a great way to go. That way, if anything happens on-site or to your primary data storage, you have backups you can rely on to restore lost or inaccessible data. Plus, having a solid cloud storage option gives remote employees ready access to any data they might need while at home or on the go.

Where Do You Begin?

Some SMBs have the time, money, and resources to invest in on-site IT personnel, but most don’t. It is a big investment. This is where partnering with an experienced IT services firm can really pay off. You may have employees in-office or you may have a team working remotely – or you may have a mix of both. You need support that can take care of everyone in your organization while taking care of the data security of the business itself. This is where an IT partner like Net Activity comes into play. They are someone you can rely on 24/7 and someone who will be there for you during a pandemic or any other disaster.

BYOD vs. CYOD: Which Is Better For Your Business?

Bring your own device (BYOD) and choose your own device (CYOD) policies have been shown to enhance employees’ flexibility, productivity, and job satisfaction. If you’re thinking of adopting one of these strategies, here are some things to consider.

What is BYOD?

With BYOD, employees use their own devices, such as smartphones and laptops, to connect to the company network, access business data and applications, and perform work-related tasks. Since your staff are already familiar with these devices, the need to learn and adjust to new technology is eliminated. Therefore, your employees can get right to work, which leads to higher efficiency as well as better employee experience.

Also, BYOD gives employees greater flexibility and increased mobility, as it enables them to work anywhere, anytime. They don’t have to be chained to a desk in order to do their tasks. Instead, they can use their smartphones to check emails or their laptops to edit documents even when they’re on the go.

Your business stands to gain a lot from BYOD as well. Aside from enjoying enhanced employee productivity, you can reduce expenses related to owning computers and mobile devices, including maintenance and upgrades. The money you save can be put toward investments to further improve your bottom line.

However, the main drawback of BYOD is the risk involved when you grant employee-owned devices access to corporate resources. If you’re considering adopting BYOD, you must create a BYOD security policy to ensure that your company’s assets are well protected. This policy should outline key elements such as:

  • The applications and data that employees can access from their personal devices
  • The minimum security control requirements for employee-owned devices
  • The implementation of a mobile device management solution that will allow your IT staff to remotely wipe lost or stolen devices of company data

What is CYOD?

CYOD allows users to choose from a list of devices approved by the company. In this regard, CYOD is similar to BYOD — it gives employees freedom of choice. While not everyone may like the selection of available devices, they may appreciate having a say regarding what computer or mobile device they’ll be using for work. You can also offer employees the option to purchase the device from the company, paying in installments or upfront.

For businesses, the biggest advantage of CYOD is security. You can equip devices with security features to ensure that sensitive data is properly protected. However, since you own the devices, the responsibility of spending on security and optimization will fall on you. This may not be ideal for small businesses or those with a limited budget.

Which policy should your company adopt?

Ultimately, the choice between BYOD and CYOD boils down to what your business needs. If you’re operating on a tight budget, a BYOD policy is the right option for you. On the other hand, CYOD is perfect if you want to ensure the security of your data and other company assets.

If you still need more information to help you make a decision or you just need guidance on all things related to business IT, give Net Activity’s experts a call today.

Microsoft Teams Fend Off Phishing Attacks With Link Protection

Microsoft Defender has long included “Safe Links” protection as part of its overall function. The company recently announced that it would be extending Safe Link functionality to protect from inside Microsoft Teams.

Safe Links is a powerful safety feature that scans a web link in real-time as a user clicks on it. Many users share useful links inside Teams. Most of the shared links are fine but some point back to poisoned websites that contain malicious code. That could potentially infect a user’s computer or other devices. Microsoft aims to limit this risk by extending the protection that Safe Links provides to include Teams.

The company had this to say about the change in a recent blog post:

“With today’s announcement, organizations with Microsoft Defender for Office 365 can further protect Microsoft Teams users from malicious phishing attacks that are often orchestrated using weaponized URLs.

Safe Links in Defender for Office 365 scans URLs at the time of click to ensure that users are protected with the latest intelligence from Microsoft Defender.”

It’s a very good and very timely change. Teams has seen explosive growth over the last year and a half. Some of that growth would have occurred even without the pandemic but Covid-19 is undoubtedly the reason for most of the surge.

Because so many more people are using teams, the decision to extend Safe Links protection to the platform was easy.

Kudos to Microsoft for taking an active stance here and providing even better and more robust protections to one of the company’s most popular products. This will by no means completely prevent poisoned links from being shared because no system is perfect. It will dramatically reduce the number though and that’s a very good thing.

Sharing Calendars With Microsoft 365 Is Easy

If you want to keep everyone updated on each other’s assignments or improve your team’s productivity, sharing your calendar on Microsoft 365 is a must. In this article, we’ll take a look at how you can sync your schedules on different versions of Outlook.

Outlook on the web

If you have Microsoft 365 or another email service based on Microsoft Exchange Online, follow these steps to share your calendar:

  1. Open the Calendar by clicking on the calendar icon at the bottom of the page.
  2. Once you’re in Calendar, go to the toolbar at the top of the page. Click on Share and choose which calendar you want to share. Keep in mind that you can only share calendars you own and not other people’s.
  3. Indicate whom you want to share your calendar with by entering their email address or name.
  4. Select which activities recipients are permitted to perform on your calendar. You can choose from the following:
    • Can view when I’m busy ⁠– if you want the calendar to show when you’re busy but hide certain details
    • Can view titles and locations ⁠– if you want the calendar to indicate when you’re busy, as well as key details like an event’s title or location
    • Can view all details ⁠– if you want the calendar to reveal all details about an event
    • Can edit ⁠– if you want recipients to be able to modify your calendar
    • Delegate ⁠– if you want recipients to be able to alter your calendar and share it with other users
  5. To proceed, click on Share. If you change your mind, click on the Trash icon to cancel sharing your calendar.

Alternatively, you can publish your calendar and share it with others using a URL. Here’s how you do it:

  1. In Calendar, go to Settings and click View all Outlook settings.
  2. Select Shared calendars.
  3. Go to Publish a calendar and choose which calendar you want to publish and how much information is revealed to recipients.
  4. Click Publish.
  5. You will be given the choice between using an HTML or an ICS link. The HTML link can be used to view your calendar using a browser like Firefox or Google Chrome. An ICS link allows recipients to import your calendar and view it on their own Outlook calendar.

Outlook.com

Like Outlook on the web, Outlook.com allows you to share your calendar directly or publish it. The steps for sharing are exactly like those used in Outlook on the web, too, except you only have two options for how recipients can use your calendar. These are “Can view all details” and “Can edit.

Publishing your calendar on Outlook.com requires you to::

  1. Click on the calendar icon to open the Calendar view.
  2. In Calendar, go to Settings and click View all Outlook settings.
  3. Go to Calendar and select Shared calendars.
  4. In “Publish a calendar,” select which calendar you’re publishing and how much information it contains.
  5. Click Publish and choose to use either an HTML or ICS link.

Outlook on iOS and Android

If you’re using a mobile version of Outlook, these are the steps for sharing your calendar:

  1. On your Outlook app, click the hamburger button at the top-left corner and select Calendar.
  2. Go to Share and tap on Add People to indicate your calendar’s recipients.
  3. Input each recipient’s name or email address. Once you’re done, tap on the Check button at the top-right corner of the page.
  4. You will see a list of recipients. Tap on a name to edit their permissions and how much information they’re allowed to see. As with Outlook on the web, available options are “Can View,” “Can Edit,” “Delegate,” “Only When I’m Busy,” “Only Titles and Locations,” and “All Details.”
  5. To remove a user from your recipients, tap on Remove at the bottom of the page.
  6. After you’ve set permissions, tap on the Check button at the top-right corner of the page.


The Outlook calendar is an excellent feature for managing your team’s events and workflows and can help boost your efficiency and productivity. If you have other questions and concerns about Microsoft 365, get in touch with Net Activity today.

Lost Employee Smartphone? 7 Steps You Need to Take Now

“Hey boss, I lost my smartphone.”

How well have you prepared for this moment? It will happen sooner or later. If your company has a plan in place, no big deal. If not, you may suddenly get that sinking feeling in your gut…And well you might. You now have three big worries:

Compliance Issues –If your employee had access to information covered by any number of regulations, your company could be subject to stiff penalties. One employer we know of wound up with a $900,000 fine.

Data Security –Sensitive company data in the wrong hands could spell disaster. Access to your network, secure sites, proprietary files, work-related e-mails and corporate secrets may now be out of your control. You must move quickly to prevent serious financial harm.

Employee Privacy and Property Concerns –If a valued employee had family photos and movies on the device, and you remotely delete all data on the phone, you may now have a disgruntled, or even uncooperative, employee. Especially if company policy regarding BYOD (bring your own device) and data loss were not clearly stated and agreed to up-front.

So how do you prevent a relatively minor incident from blowing up into a big problem? Here are seven smart measures you can take right now to prepare for the day an employee smartphone is lost or stolen:

  1. Install a mobile device management (MDM) system on any employee device to be used at work. This software can create a virtual wall separating work data from personal. It facilitates any security measures you wish to impose. And to protect employee privacy, it can limit company access to work data only.
  • Determine which devices will be allowed and which types of company data people may access from them.
  • Require that employees agree with an Acceptable Use Policy before they connect to your network. Make sure these include notice as to conditions in which company data may be “wiped” –i.e., destroyed. Also include specific policies regarding device inspection and removal of company records.
  • Put strong data protection practices in place. Require use of hard-to-crack passwords and auto-locking after periods of inactivity. Establish protocols for reporting lost or stolen devices. Mandate antivirus and other protective software as well as regular backups.
  • Designate someone at your company to authorize access to software and critical data. This person can also be your main point of contact for questions about BYOD policy and practices. It might also work well to distribute a resource page or FAQ document to your employees.
  • Establish a standard protocol for what to do when a device is lost or stolen. Both Android and iOS phones have features that allow device owners to locate, lock and/or “wipe” all data on their phones. Make sure your policy requires that these features are set up in advance. Then, when a device is lost or stolen, your employee can be instructed to take appropriate action according to your protocol in order to protect company data.
  • And finally, your best protection is to implement a well-crafted Acceptable Use/BYOD policy in advance. Develop it in partnership with risk management and operations personnel, as well as legal counsel and IT professionals, to come up with an effective and comprehensive plan.

Download a Mobile Device/Acceptable Use Policy Template here to get started.

Don’t risk waiting until an incident occurs! Begin the process with our template, and contact us anytime for help clarifying and developing a “bulletproof” policy to keep your data safe. Contact us today 216-503-5150.

4 Ways Microsoft Bookings Saves You Time

We all undeniably have hectic schedules, and they’re made even worse with unorganized meetings, impromptu lunch dates, and unscheduled yoga classes. To move or cancel appointments, your clients would generally have to pick up the phone and call someone, which can be a drag. But with Microsoft Bookings, clients can schedule and effortlessly manage appointments. In case one isn’t enough, here are four more reasons to give it a go:

Visibility

Bid adieu to the days of scribbling on post-its and frantically going through your schedule to find out where you’re heading for lunch. Microsoft Bookings provides you with a unique webpage that is compatible on both desktops and mobile devices. Here, customers can select times and dates based on current availability — simply enter the contact information and then book it! The system fully automates the process of managing your appointments.

No more rain checks

Cancellations and missed appointments mean wasted time slots unless you’re able to fill them up with new bookings. Avoid lost income by controlling how much advance notice is required to make a cancellation. With Bookings, appointments appear immediately in staff calendars and can be added or revised by customers in their own personal calendars. Additionally, a confirmation email is automatically sent to the customer, which is then followed by another automatic email reminder before the appointment time. The web page also offers a rescheduling service: customers can simply click on the link on the confirmation email and pick a time that they’re more comfortable with.

Synchronization

Once completed, the booking is then synced to a centralized calendar where businesses are given the option to reschedule, cancel, or reassign the appointment to other staff members as they see fit.

If you do decide to reassign it to staff members, Bookings offers a nifty feature known as “split view.” This shows which staff members are booked at which times, and you can compare everyone’s schedules side-by-side. The appointments are synced not only to your calendar but to the staff members’ calendars as well. Moreover, this versatile system accommodates Office 365, Outlook, and even Google Calendar, so clients and staff can keep whatever calendaring service they prefer.

Double duty

Appointment setting might be the primary goal of Bookings, but the system can also be utilized to build your company’s customer list. Once customers input their information into the system, it automatically creates contact entries for those customers. The contact card contains personal information such as your customer’s name, address, phone number, and email address.

And, as your company grows, you can add more staff members as well as create additional booking pages for free. Furthermore, staff members aren’t required to have Office 365 subscriptions to be a part of the service.

Efficient tech resources aren’t enough to maintain a successful business anymore. To really stand out from competitors, you need comprehensive appointment management. Give us a call if you need any questions answered or issues addressed. We’re more than happy to help.

6 Ways To Strengthen Your BYOD Security

Many businesses are adopting bring your own device (BYOD) policies as more employees work from home. The problem is, if you’re not careful, BYOD can expose your company to major cybersecurity risks, including the following.

Loss or theft of devices – Employees often bring their personal devices wherever they go. This means there’s a higher chance of devices, as well as the data stored in them, being lost or stolen.

Man-in-the-middle (MITM) attacks – Cybercriminals can intercept information transmitted from employees’ devices if these are connected to poorly secured public Wi-Fi networks.

Jailbroken devices – Jailbreaking is the process of removing the restrictions imposed by the manufacturer of a device, typically to allow the installation of unauthorized third-party software. This increases the risk of an employee inadvertently installing malicious software on a personal device.

Security vulnerabilities – If employees have outdated operating systems and software on their devices, cybercriminals can exploit unpatched vulnerabilities to gain unfettered access to company systems

Malware – A personal device that has been infected with malware can spread that malware to other devices that are connected to the company network and cause data loss and downtime.


To mitigate these risks, you must devise a BYOD security policy that works for the needs of your business as well as the needs of your employees. Here’s what you need to do:

  1. Set passwords on all BYOD devices

Prevent unauthorized access to company data by enforcing the use of passwords on all employee devices and accounts. Passwords should be unique; contain letters, numbers, and symbols; and are at least 12 characters long. It’s also a good idea to implement multifactor authentication to add another method of identity verification such as fingerprint scans or temporary passcodes sent via email.


  1. Blacklist unsanctioned applications

Blacklisting involves prohibiting the installation of certain applications on BYOD devices that are used for work purposes. This includes applications like games, social networking apps, and third-party file sharing platforms. The simplest way to blacklist applications is through a mobile device management platform that enables IT administrators to secure and enforce policies on enrolled devices.


  1. Restrict data access

Adopt the principle of least privilege on both BYOD and company devices. This means that a user is able to access only the data and software required to do their job. This can reduce the effects of certain types of malware and limit the fallout in the event of a data breach.


  1. Invest in anti-malware software

Anti-malware software identifies and removes malware before they cause irreparable harm to a device. The best anti-malware programs are often backed by the latest threat intelligence databases and use behavior-based detection techniques to pick up any traces of malware.


  1. Backing up device data

A well-thought-out BYOD policy can go a long way toward minimizing the risk of a security breach, but if something manages to slip past your defenses, you need to have backups prepared. Back up your data in off-site servers and in the cloud to ensure that any data stored locally on a device can be quickly recovered.


  1. Educate your staff about security

The vast majority of BYOD-related security risks involve human error. This is why you should educate your employees about proper mobile safety. Train them on spotting apps that could contain malware, sharing security threat updates, and securing their devices beyond enabling default security settings.


You should also approach us if you need assistance with protecting your BYOD environment. As a managed IT services provider, Net Activity keeps tabs on the latest trends and innovations related to BYOD and will recommend solutions that work for your company. Contact us today to see how we can help.

6 Ways to Save Energy With Your PC

It may be difficult to save energy when you use your PC every day. In fact, a complete desktop computer setup (i.e., one that includes an internet modem, a pair of loudspeakers, and a printer) that is on for eight hours a day consumes 600 kWh per year. But don’t worry, you can use the following tips to reduce your PC power consumption.

1. Unplug your computer when not in use

When you’re not using your computer, it’s best to shut it down and unplug it. This is because a plugged-in PC — even when switched off — still consumes standby power.

2. Disconnect external devices

When they’re connected to your PC, devices such as printers, headphones, and webcams consume power even when they’re not in use. This is why you should disconnect or remove external devices from your PC once you’re done using them.

3. Alternatively, use a smart strip, especially for computers you cannot turn off

A smart strip is a series of several electrical outlets in one strip, with circuits to monitor and maximize your gadgets’ power consumption. It can electronically unplug any device so that they stop drawing current, which saves energy. By connecting your PC and peripherals (e.g., printers, scanners) to the smart strip, you won’t need to unplug your equipment when you’re not using them.

4. Adjust your computer’s energy settings

Adjusting your PC’s power settings will help you consume less energy. For example, you can opt to put your hard drive and monitor into sleep mode when they’re left idle for a few minutes. Lowering the brightness of your screen also saves electricity.

5. Use a charger only when your laptop is charging

When we charge our laptops, we tend to forget about them, leaving them plugged in for hours. Unfortunately, overcharging degrades the battery over time. Leaving the charger plugged in — even if it’s not connected to your computer — also consumes standby power.

To save energy, make sure to unplug your laptop charger once you’re done charging. Alternatively, you can use a wall outlet with a timer or plug your charger into a smart strip.

6. Choose an Energy Star-compliant PC

Energy Star is the US Environmental Protection Agency’s symbol for energy efficiency. Every product that earns the Energy Star symbol is guaranteed to deliver both quality performance and energy savings. The more stars a product has, the more energy-efficient it is. Studies show that a single Energy Star-compliant computer and monitor can save between $7 and $52 per year in electricity bills.

These tips should help you lower your electricity costs and make smart hardware choices. If you need assistance in choosing the best hardware for your specific needs, give us a call. We’ll be glad to help.

Special Year End Pricing !!

Microsoft Teams Rooms Systems For Small/Medium Meeting Room